
how to make almond butter in a blender is the kind of thing you probably searched after standing in your kitchen staring at a jar of store-bought spread thinking it costs way too much for something that looks like it should be simple. And yeah, you’re kinda right, it is simple, but also slightly chaotic the first time you try it, especially when your blender starts sounding like it’s questioning your life choices.
You might already have almonds sitting somewhere in a jar or bag, maybe a little forgotten in the pantry, and now you’re wondering if they can actually turn into that creamy, dreamy butter you see in fancy health shops. Spoiler: they can, but the process has a personality of its own.
Why making almond butter at home actually makes sense
You don’t just do this for fun (well, maybe a bit for fun). There are real reasons people keep going back to homemade nut butters even after buying them.
A standard 2 tablespoon serving of almond butter usually contains:
- Around 190–210 calories depending on brand
- Roughly 6–7g of protein
- About 16–18g of fat, mostly unsaturated
- A good dose of vitamin E, magnesium, and fiber
According to USDA FoodData Central, almonds are nutrient-dense foods providing high monounsaturated fats and naturally occurring antioxidants, which is part of why almond butter feels so “rich” even in small amounts.
Store-bought jars often add oils, sugar, or stabilizers. Homemade version? Just almonds. That’s it. A bit wild how simple it sounds, but also kind of satisfying.
What you actually need before starting
You don’t need a commercial kitchen setup. But your blender does matter here more than you think.
Basic ingredients
- 2–4 cups raw almonds (roasted works too, but changes flavor)
- Optional: pinch of salt
- Optional: 1–2 tsp oil (only if your blender struggles)
Equipment
- A high-power blender (or a very patient regular one)
- Spatula (non-negotiable honestly)
- Airtight jar for storage
| Tool | Why it matters |
|---|---|
| High-speed blender | Helps release almond oils faster |
| Spatula | Saves you from constantly stopping and scraping |
| Glass jar | Keeps butter fresh longer |
Small note that people ignore: if your blender is weak, you’ll think you did something wrong. You didn’t. The blender just… isn’t built for emotional nut processing.
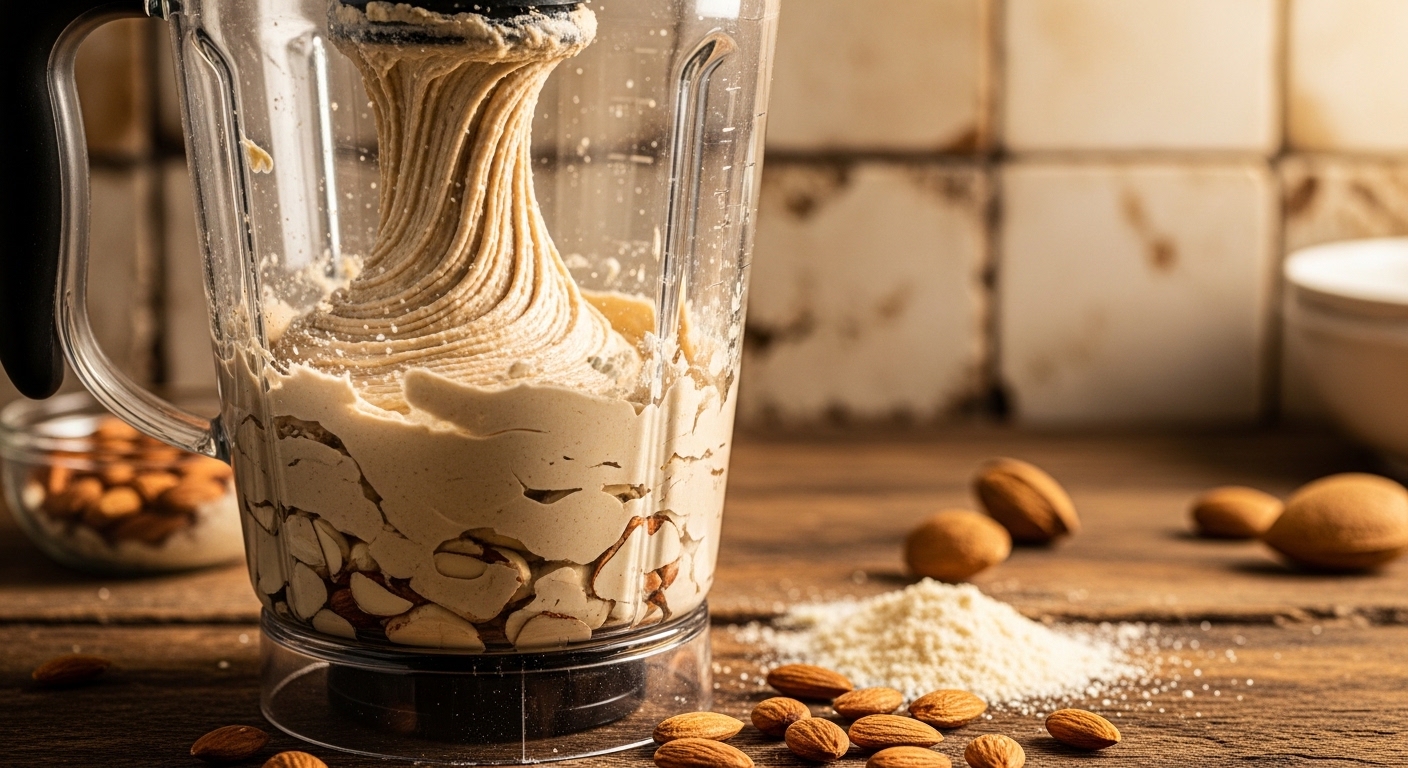
Step-by-step: how to make almond butter in a blender without losing patience
Step 1: Toasting (optional but kinda game-changing)
You can skip this, but roasting almonds at 160–170°C for 10–12 minutes brings out oils faster. It also makes the kitchen smell like you suddenly know what you’re doing in life.
Let them cool slightly before blending or you’ll steam them weirdly.
Step 2: Start blending (the noisy phase)
Pour almonds into the blender. Start slow, then go to medium-high.
At first, it will look like almond gravel. Then almond sand. Then it starts clumping. This is where most people panic and think it’s broken.
It’s not broken. It’s just doing its thing.
You’ll need to:
- Stop every 30–60 seconds
- Scrape sides with spatula
- Restart again
Yes, it feels repetitive. Yes, it’s supposed to.
Step 3: The “paste stage”
This is the awkward middle phase where it turns into a thick dough-like ball.
It might even look like it refuses to become butter at all. But keep going. The oils are slowly releasing.
If your blender is struggling:
- Add a teaspoon of neutral oil (sunflower or almond oil works)
- Pulse instead of continuous blending
Step 4: Suddenly it becomes butter
And then something weird happens. One moment it’s clumpy, next moment it’s smooth and glossy like magic.
That’s the natural almond oils fully releasing. No trick, no secret ingredient. Just physics doing its job.
Texture control (because people argue about this a lot)
You can actually decide how your almond butter behaves.
| Style | Blend time | Result |
|---|---|---|
| Chunky | 3–5 mins | Bits of almond texture |
| Creamy | 8–12 mins | Smooth, spreadable |
| Ultra-smooth | 12+ mins | Almost like commercial butter |
If you like texture, don’t over-blend. If you want that café-style smoothness, just keep going a bit longer than feels reasonable.
Common problems (and why you’re not alone)
“My blender stopped moving”
Yeah, it happens. Almonds are dry and heavy. Stop, scrape, restart. Sometimes add a tiny oil splash.
“It’s not turning into butter”
Usually just needs more time. Sometimes 10 minutes feels like 40 when you’re watching it.
“It tastes bitter”
You probably over-roasted or used old almonds. Fresh raw almonds are slightly sweet naturally.
“It’s too thick”
Blend longer or add a tiny bit of oil. Not water though, that ruins texture fast.
Storage and shelf life (important but ignored)
Homemade almond butter doesn’t have preservatives, so it behaves differently.
- Room temperature: up to 1 week (cool area)
- Refrigerator: 3–4 weeks
- Freezer: up to 3 months
Always use a clean spoon. One lazy dip and suddenly you’ve invited bacteria to the party.
Nutrition breakdown (real numbers, no guesswork)
Based on USDA FoodData Central data for almonds (per 100g approximate values):
- Calories: ~579 kcal
- Protein: ~21g
- Fat: ~49g (mostly monounsaturated fats)
- Carbohydrates: ~22g
- Fiber: ~12g
Almond butter keeps most of these nutrients because it’s literally ground almonds, nothing removed, nothing added (unless you mess with it).
Harvard Health Publishing has also repeatedly highlighted nuts, including almonds, as part of heart-healthy dietary patterns due to their unsaturated fat profile and micronutrient density.
Blender vs food processor (quick honesty section)
People argue about this way too much.
- Blender: faster but more stressful on machine
- Food processor: slower but more stable
- Cheap blender: emotional damage risk is high
If you’re using a blender, just accept that patience is part of the recipe. It’s not instant food, it’s “you wait and question life a bit” food.
Flavor upgrades you can try later
Once you’ve done the basic version, you might start experimenting:
- Cinnamon + honey (sweet breakfast spread)
- Sea salt + vanilla (bakery-style vibe)
- Cocoa powder (almost dessert-like)
- Chili flakes (yes, weird, but oddly good)
Just add these after the butter forms, not before.
Small real-world insight (not many people talk about this)
Homemade almond butter doesn’t look as perfectly smooth as store versions at first. That’s because commercial brands often use industrial grinding and sometimes stabilizers to maintain uniform texture.
So if yours looks slightly rustic or uneven, it’s actually more “real food” than “factory food.” Sounds dramatic, but that’s kind of the truth.
Final thoughts you didn’t ask for but probably needed
Making almond butter in a blender isn’t really about following steps perfectly. It’s more about trusting a messy process that slowly turns something dry and stubborn into something creamy and alive-looking.
The first time always feels longer than it should. The second time feels easier. By the third time, you’ll probably stop buying jars altogether without even noticing.
And yeah, your blender might sound like it’s suffering a bit. But that’s just part of the story.

Jamesmathew is an expert Amazon affiliate writer, helping readers discover top products, smart deals, and practical buying guides through honest reviews and insightful content.